Chapter Zero: Get Started in TypeDB Studio
Setting Up Your Environment Before Your First Query
Run TypeDB
| Already have a running TypeDB server? You can skip this section and jump straight to What is TypeDB Studio? |
Create a free cluster
-
Create a TypeDB Cloud account. Your first cluster is free.
-
On the dashboard, click Deploy a cluster.
-
Configure your cluster, then click Deploy. Your cluster will be created in a few seconds.
Alternatively, you can run TypeDB Community Edition in your own environment. If you would like to do this, visit the Install CE page.
What is TypeDB Studio?
TypeDB Studio is the visual interface for working with TypeDB. It is where you will write and run every query in this guide — defining your schema, inserting data, and running audit queries.
Step 1: Create the rbac_in_business Database
If you aren’t connected to a TypeDB server in Studio yet, follow the instructions for your TypeDB edition:
-
Cloud
-
Enterprise
-
Community Edition
-
In the TypeDB Cloud website, navigate to your cluster and click Connect. Then, click Connect with TypeDB Studio. This will launch TypeDB Studio.
-
Fill in your password and hit Connect. Your password can be found in your downloaded credentials file (if you have one).
-
Launch TypeDB Studio (https://studio.typedb.com, or the desktop app)
-
Enter the address of the HTTP endpoint of your cluster. By default, this is at port 8000.
-
Enter your username and password.
-
Click
Connect.
-
Launch TypeDB Studio (https://studio.typedb.com, or the desktop app)
-
Enter the address of the HTTP endpoint of your cluster. By default, this is at port 8000 and for local instances you can use
http://localhost:8000. -
Enter your username and password - defaults are
adminandpassword. -
Click
Connect.
Once connected, create a new database for this project:
-
In the top bar, find the database selector — it shows the currently active database or 'No database selected'
-
Open it and select '+ New Database'
-
Name it
rbac_in_business— this is the database you’ll build throughout this guide. (You can name it anything you like, but this guide will assume it is named 'rbac_in_business'. Leave the sample dataset field blank.)
|
💡 Optional: Create your own database user
You are most likely logged in as 'admin'. In a production database, it’s good security practice to create individual user logins. Try creating your own database user - go to the Users page in Studio, create a new user, log out and back in with the new credentials. You will need your TypeDB server address to hand - get this from your TypeDB Cloud dashboard or your TypeDB CE terminal output. |
Step 2: The Query Page
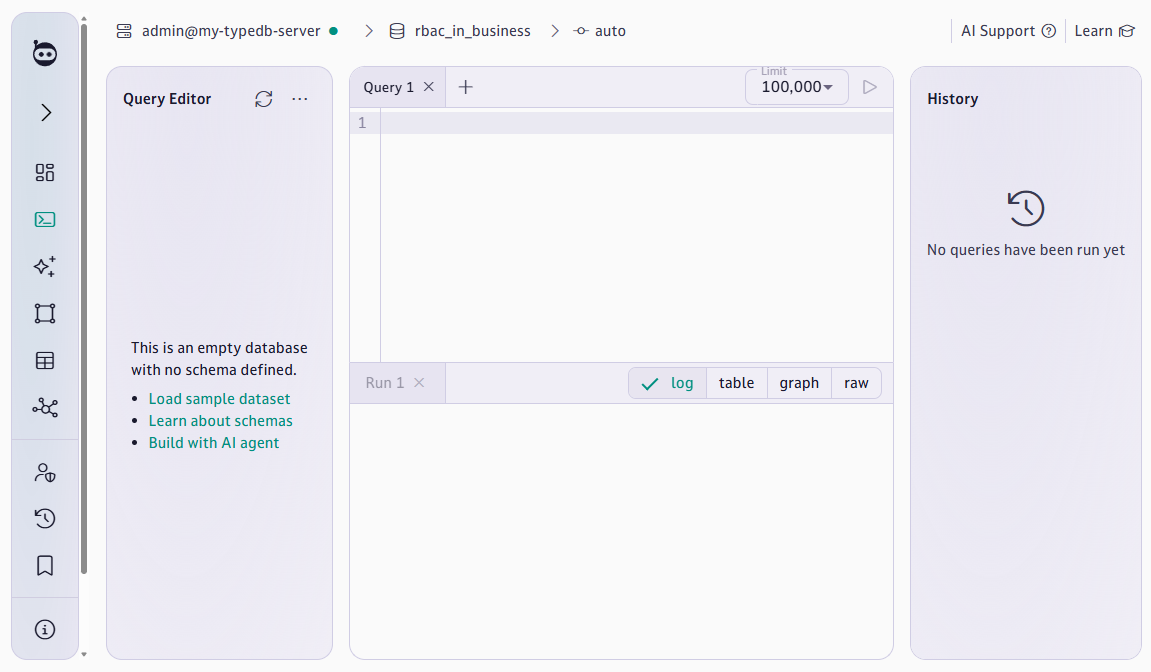
For this guide, we’ll mostly use the Schema page and the Query page. The Schema page shows a visual graph of your type hierarchy. The Query page is where you write and run TypeQL.
You are most likely already on the Query page, but if not, navigate to it now. This is where every query in this guide will be written and run — both schema definitions and data inserts.
Step 3: Auto Mode vs Manual Mode
TypeDB has three transaction types: schema (for define/undefine/redefine), write (for insert/delete), and read (for match/fetch). In manual mode, you select the correct transaction type before every query and commit it afterwards.
Auto mode handles all of this for you. Studio detects what kind of query you’re running and opens and commits the right transaction automatically.
|
✅ Enable auto transaction mode now
Find the transaction mode toggle in the top toolbar of the Query page. It should be set to 'auto'. In this mode, you simply write your query and run it. Studio will handle the rest. This guide assumes auto mode is enabled. |